2D Superimposed Test

Since my transition from 2D to 3D I felt that I had not the skill to use 3D characters. I thought of superimposing 2D characters in a 3D space. I have mostly been inspired by the early cartoon tests of the 1940’s involving the real world and cartoons and the biggest example of the technique the movie Who Framed Roger Rabbit. Made in 2016

Final (Part 1)

For the final project that involves a CNC machine I stared first with the idea of an interactive puzzle based off one of my classmates that she in the pass has done work that it welcomes the viewer to participate. I tried designing one and I didn’t liked it  is not really my style.

My roommate is a landscape architecture so I see a lot of elevation plans in my room, I decided to try to create a fictional landscape first with some futuristic ideas. It turned out good but it didn’t felt natural because it was a landscape that I made up. I then went to the USGS and looked up maps of different areas of the country. I decided to do a local area so people could relate more as my last project was a disaster for not able to relate to everyone. I took maps of the Amherst area and placed them as planes in the software. I then stared tracing all the elevation points within the boundary box that I created. I decided to take some liberties; everything goes up I didn’t made areas that go down which is not natural but instead I extrude them out upwards creating some slopes but it was something that was created naturally during the process. I followed a scale according to the height of the hills on the map. The maximum height on the map is 450 feet while the lowest is 100 feet. So every 50 feet is a grid point making the height of the point go according to the real world (technically only in the z axis) but also making it small as the maximum height doesn’t surpass 1 inch. I also was planning to make buildings but they would be so small that recreating them in the CNC machine could be difficult next to impossible because of the scale and how close most of them (like houses) the drill would probably destroy each one while creating the next one. Below are images of the project in the software Rhino.


3D Printed Project (Part 1)

For this project I first google searched art work that was made by the process of 3D printing. I decided to recreate a sculpture that  made years ago and to modify it to the way I first Imagined it. I was unable to fulfill my goal of the sculpture before because I didn’t have the skill to create an item like that mixing the medium.

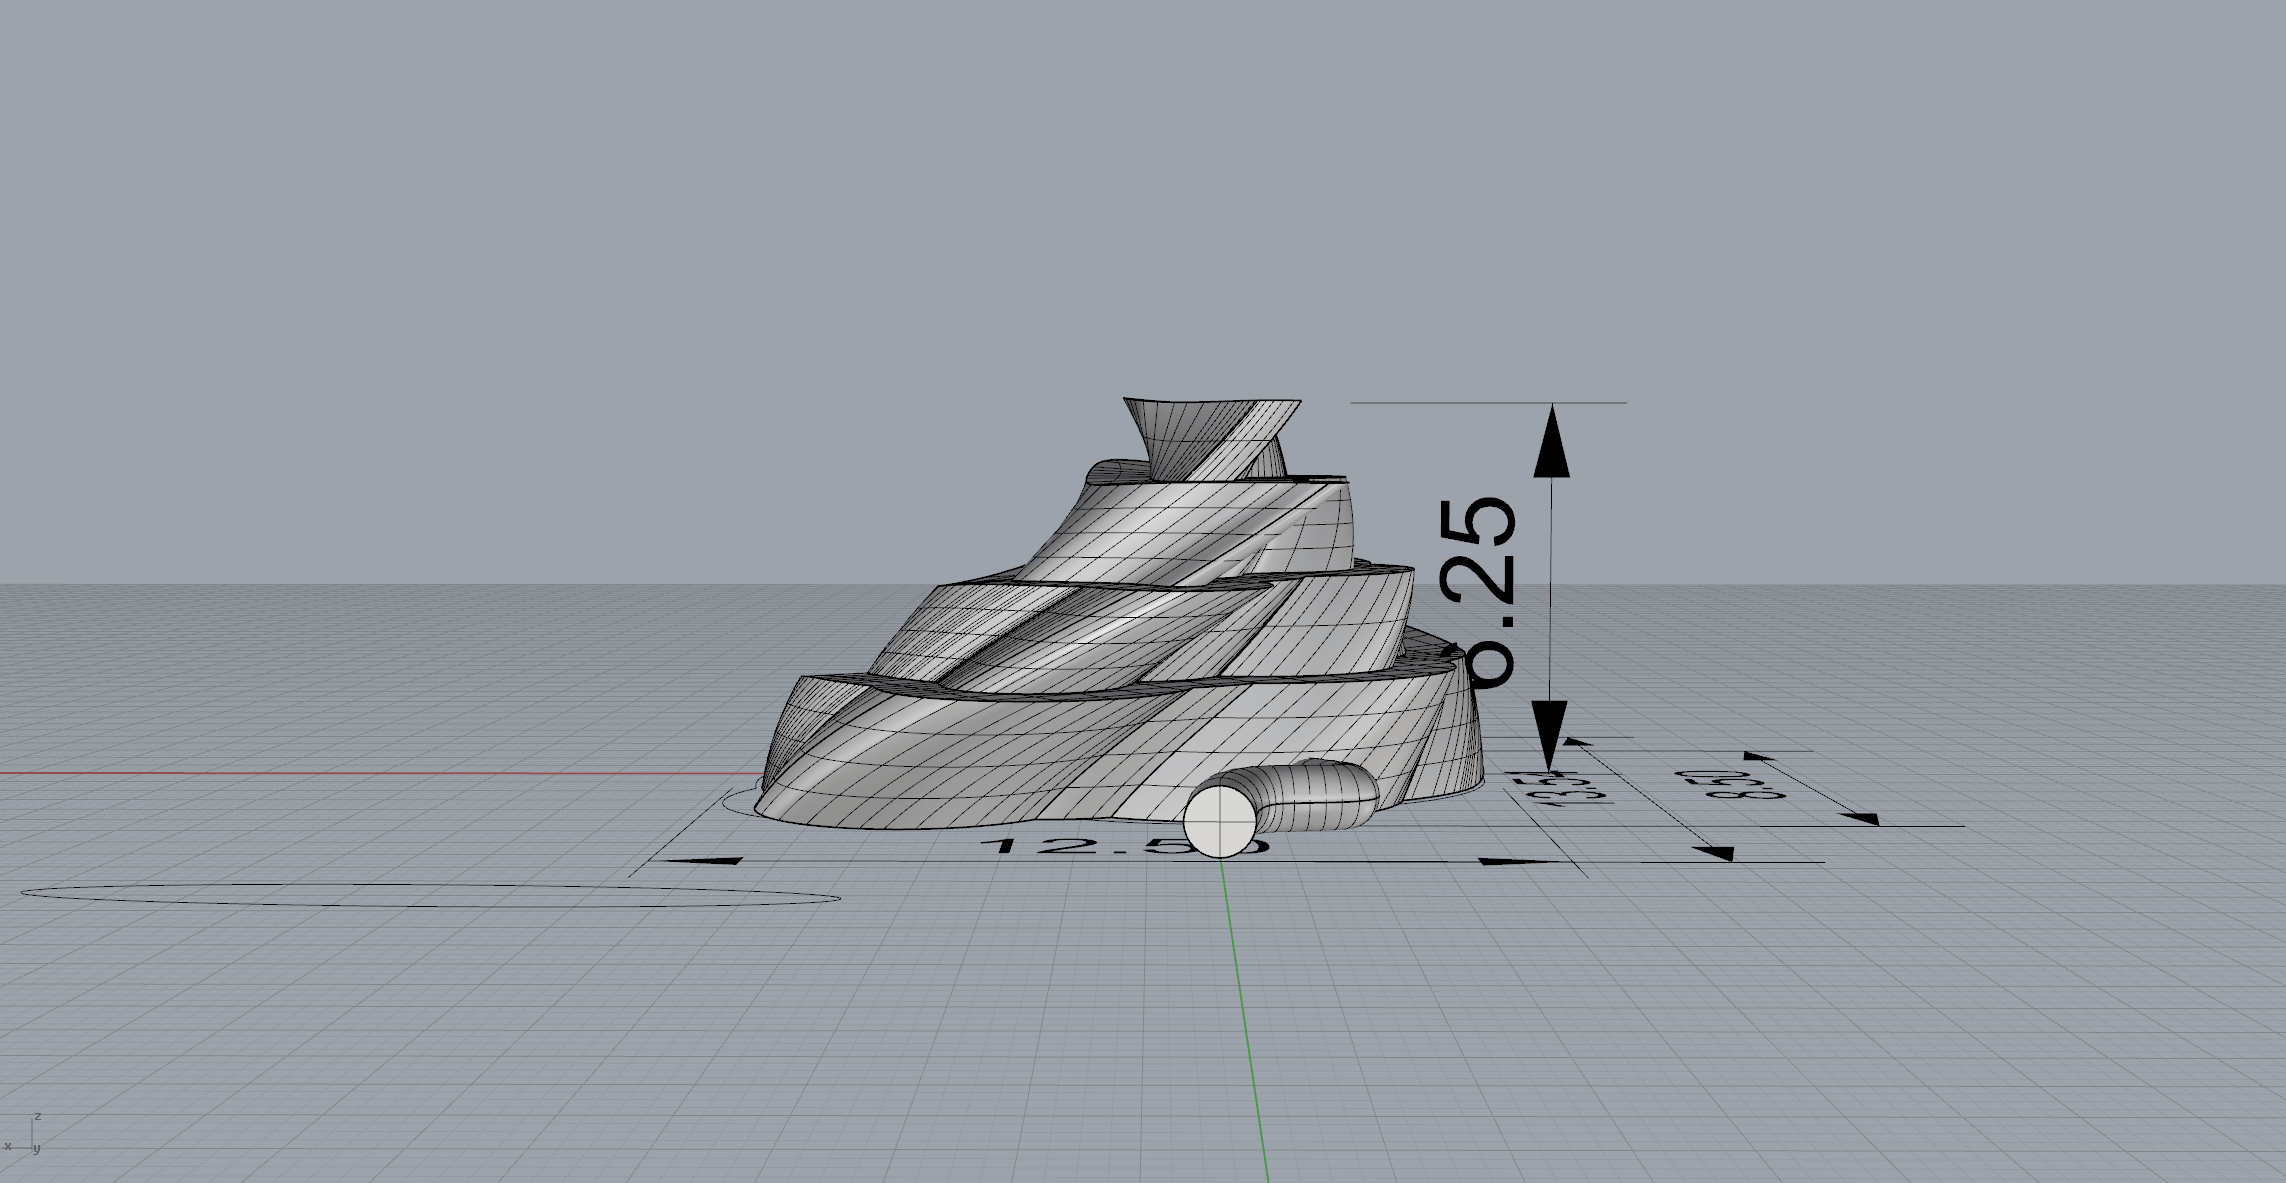
First I created the base of the sculpture, I made a square base with enough space to build on top. I created the edge of the base to be tapering off ending with a thin junction giving it a sense of modernism and detail. I then plopped down a rectangle that would fir proportionally to the base. I created the main structure using extrusion and edit points so I edited each point of the object to conform to an organic form instead of the (perfect) man shaped shapes that are nonexistent in the real world.    I then added a sturctural suport on the side, and another on a semi-circle bend 90 degrees giving a lot of support, and after that I replicated the same cupport but placed it in a way that it may look like an ear. I then joined all the objects together and I modified them giving the tools bend and twist. After that I added gears found online made by an engineer. I added the gears one on the person’s temple and a couple on the sides for decoration. The twist that the sculpture has plus the gears were placed in a way as if the gear came flying and struck the “man” on the forehead but just the split second in between not the before nor the after of the struck.

Measuring 9 inches tall the model was sent to the library for printing.

Part 2 (Final process, critique.

Practice Model

For exercise we were required to use three tools on rhino plus a new one we haven’t used before.

The model stared as a line that I then used the extrusion tool to create the first level then I copy-pasted it to create the second level. I used the gumball to shrink it proportionally. I then joined the two  together then I repeated the process until I reached the desired height. I used the twist tool to try to make it look like the Walt Disney Concert hall, or at least the architectural traits like the modernism style mixed with the futuristic hope of the designers using organic forms that are against the usual box shaped building. I also used the tool bend on a different axis making the base tremble giving it a slick and ferocious style. The tool I used that I have never used before was pipe. I drew a snake-shaped line across the model and then I used the pipe command. I gave it enough thickness as if it is a tunnel for people to come in into the building. I really enjoyed this exercise and I was focusing on creating a model that that liked so I could work with it in the future if my path takes me to a more 3D printed art.

The Mistic Project

Right after the creation of my CNC project of the landscape features of Amherst Massachusetts. I wanted to create a fictional Town in the area North of Williamsburg Massachusetts. This Towns name being Mistic the former name Barnstable Mass. I created a paper map of the area and then started to make the town center when I noticed that my original plans didn’t considered geographical gradation of heights making the place look flat. I didn’t took the real world geography into consideration when created the map so I decided to stop with the project and work on some projects that have some sort gradation in height.

Made in 2015

3D Printing (Part 1)

For the 3D Printing Assignment I first looked online for works that artists made with the process of 3D printing. I decided to re-create a sculpture that I created years ago, that I visualized differently but my skills were limited at the time. Instead of making it actually size I will trim off a couple of inches so it can be printed within the boundary box.